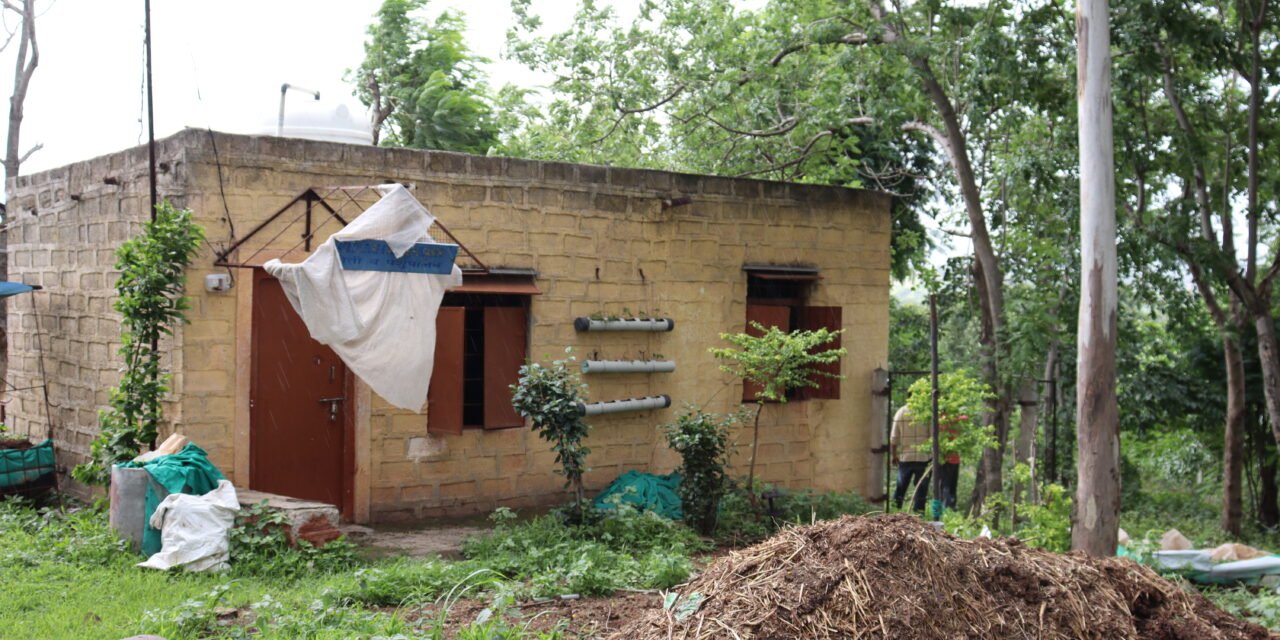
1. The study of cow record
Aim
To study the record of cow
| Date | Milk | green fodder | dry fodder | consestation feed | |
| 16/12/2021 | 10+10 | 3+3 | 2+2+2 | ||
| 17 /12/2021 | 10+10 | 3+3 | 2+2+2 | ||
| 18 /12/2021 | 10+10 | 3+3 | 2+2+2 | ||
| 19 /12/2021 | 10+10 | 3+3 | 2+2+2 | ||
| 20 /12/2021 | 10+10 | 3+3 | 2+2+2 | ||
| 21 /12/2021 | 10+10 | 3+3 | 2+2+2 | ||
| 22 /12/2021 | 10+10 | 3+3 | 2+2+2 | ||
| 23 /12/2021 | 10+10 | 3+3 | 2+2+2 | ||
| 24 /12/2021 | 10+10 | 3+3 | 2+2+2 | ||
| 25 /12/2021 | 10+10 | 3+3 | 2+2+2 | ||
| 26 /12/2021 | 10+10 | 3+3 | 2+2+2 | ||
| 26 /12/2021 | 10+10 | 3+3 | 2+2+2 | ||
| 27 /12/2021 | 10+10 | 3+3 | 2+2+2 | ||
| 29 /12/2021 | 10+10 | 3+3 | 2+2+2 | ||
| 30 /12/2021 | 10+10 | 3+3 | 2+2+2 | ||
| 31 /12/2021 | 10+10 | 3+3 | 2+2+2 | ||
| 1/01/2022 | 10+10 | 3+3 | 2+2+2 | ||
| 2 /01/2022 | 10+10 | 3+3 | 2+2+2 | ||
| 3 /01/2022 | 10+10 | 3+3 | 2+2+2 | ||
| 4 /01/2022 | 10+10 | 3+3 | 2+2+2 | ||
| 5 /01/2022 | 10+10 | 3+3 | 2+2+2 | ||
| 6 /01/2022 | 10+10 | 3+3 | 2+2+2 | ||
| 7 /01/2022 | 10+10 | 3+3 | 2+2+2 | ||
| 8 /01/2022 | 10+10 | 3+3 | 2+2+2 | ||
| 9 /01/2022 | 10+10 | 3+3 | 2+2+2 | ||
| 10 /01/2022 | 10+10 | 3+3 | 2+2+2 | ||
| 11 /01/2022 | 10+10 | 3+3 | 2+2+2 | ||
| 12 /01/2022 | 10+10 | 3+3 | 2+2+2 | ||
| 13 /01/2022 | 10+10 | 3+3 | 2+2+2 | ||
14 /01/2022 | 10+10 | 3+3 | 2+2+2 |
why keeping food and milk record of cow ?
because food is giving same quantity in everyday therefore cow should be how much gives milk in everyday .this difference easily understanding to the record of cow chart.
Accurate health and production records help producers make meaningful decisions and can be a powerful tool.
2. Milking
Aim
Take milking of cow
Equipment
Machine of milking, bucket,hot water,etc.
procedure
1.take a hot water and wash the breast of cow
2. after apply to the machine of milking to the breast of cow.
3.Machine apply only 7 minutes to the breast of cow
Observation
1.Wash the breast properly
2.To attention the machine of milking only apply seven minutes.
3.Making dry fodder
Aim
To making dry fodder the using machine.of making of fodder machine.
equipment
fodder machine, weight
Requirement :
Procedure:
Frist take dry fodder
4. TO MAKE A AZOLLA BED
Mar 3, 2022 | Uncategorized

AIM : to make a azolla bed
REQUIREMENTS: azolla bed plastic , water , azolla , soil, slurry , stabd , bricks
PROCEDURE:1. First insert the iron rebar into the ground
2. then insert the azolla bed plastic into the rebar with the slots provided
3. use the bricks to line the border of the bed
4. fill the inside with some soil not too much just to layer
5. pour some water upto 1 whole finger tall
6. ppour a bucket of slurry into it
7. leaaeve ti for some time till all the garbage that is the leaves float to the top
8. remove iit with siewe
9. put some azolla to start te process and you are done
5 . TO DO KALAM
Mar 3, 2022 | Uncategorized
AIM :to do kalam
REQUIREMENTS: mother plant , daughter plant , gibberellic acid , sutali
PROCEDURE: 1. Cut some part of the branch in between such that it does not break
2. cut the sutali in such a way that its strands come out
3. add 5ml of gibberellic acid on the sulati
4. then rub it on the sutali
5. then tie some milk pouch plastic on it and tie it with sutali in such a way that no air can go inside
6.TO REMOVE THE UNWANTED GRASS FROM THE FIELD
Mar 3, 2022 | Uncategorized

AIM : To remove the unwanted grass from the field
REQUIREMENTS: field , sickle , labour
PROCEDURE VIA HERBICIDES : 1. Mix the herbicides with some water and sray
INFO : the unwanted grass that comes with the crop plant and eats its fertilizers and water is called tan
herbicides kill the weeds that grow with the crops there are 2 types of herbicides
SELECTIVE : this type of herbicide kills only the weed’s that grows with the plant crop and not the crop itself this is called selective herbicide
NON-SELECTIVE : this type of herbicide kills any plant that comes with its contact
PROCEDURE VIA LABOUR : get the labour and remove the weeds manually
7.TO APPROXIMATE THE AGE OF A GOAT ON THE NO OF IT’S TEETHS
Mar 3, 2022 | Uncategorized

AIM : to approximate the age of a cow based on its teeths no
REQUIREMENTS: goat
PROCEDURE:1. Just count the teeths o the goat
2. based pon the nio of teeths on the adjoining chart determine its age
OBSERVATION : Usmanabadi : 6 teeth all big :
Sojati : 6 teeth all big :
Sai : 6 teeth all small : 3 months
Pail palak : 6 teeth 2 big and 4 small : 4 months
Saai : 6 teeth all small : 2 months Anmol : 6 teeth all teeny tiny : 2 weeks
8.TO SPRAY THE PLANTS WITH FUNGICIDES AND GIBRELIC ACID
Mar 3, 2022 | Uncategorized
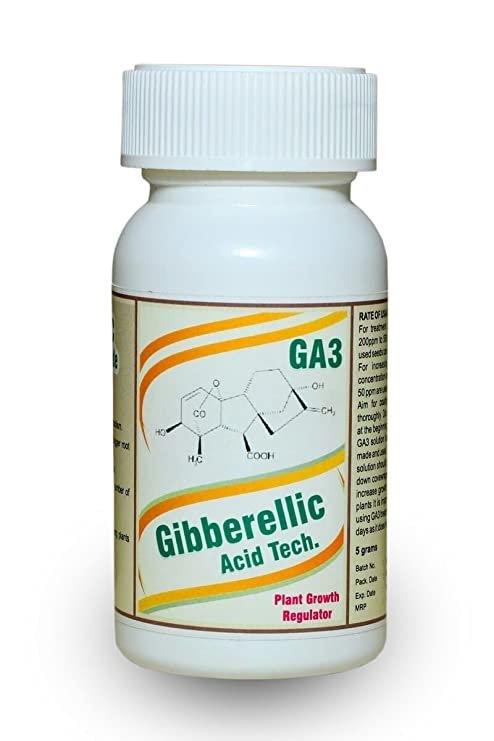
AIM :to make the chemical spray to make the plants grow faster and to kill the fungus
REQUIREMENTS: M45 , plants , water , gibberellic acid , spray can
PROCEDURE:1 . in a 5L of water in the spray can
2. mix some gibberellic acid approximate 20ml
3. mix some M45 in it to kill the fungus
4. and add oil neem oil and spray
TEMPERATURE OF A GOAT
Feb 26, 2022 | Uncategorized

AIM: to take the temperature of a goat
REQUIREMENTS: goat , digital thermometer
PROCEDURE FOR THE GOAT :1. Start the thermometer
2. hold the goat still
3. insert the thermometer into the goat’s ass
4. take the readings when the no stop spinning
PROCEDURE FOR THE COW :1. Start the thermometer
2. hold the cow still
3. insert the thermometer into the cow’s ass
4. take the readings when the no stop spinning
PROCEDURE FOR THE HEN :1. Start the thermometer
2. hold thehen still
3. insert the thermometer under the hen’s wings
4. take the readings when the no stop spinning
BENEFITS OF MUNCHING
Feb 26, 2022 | Uncategorized
AIM: benefits of munching
REQUIREMENTS: dry grass, slurry . plants
PROCEDURE :1. Make the adjoining shaped configuration of the plant
2. plant the sapling in the mountain on the top
3. put some dry grass around it and pour some water
INFO: 1. Munching helps to provide the much necessary carbon-di-oxide to the plants and also the nutrients
2. in winter it helps to attract the free water from the moisture so that it reduces the watering problem
3. if weeds grow nearby, it then they are easy to remove
DRIP IRRIGATION SYSTEM
Feb 26, 2022 | Uncategorized
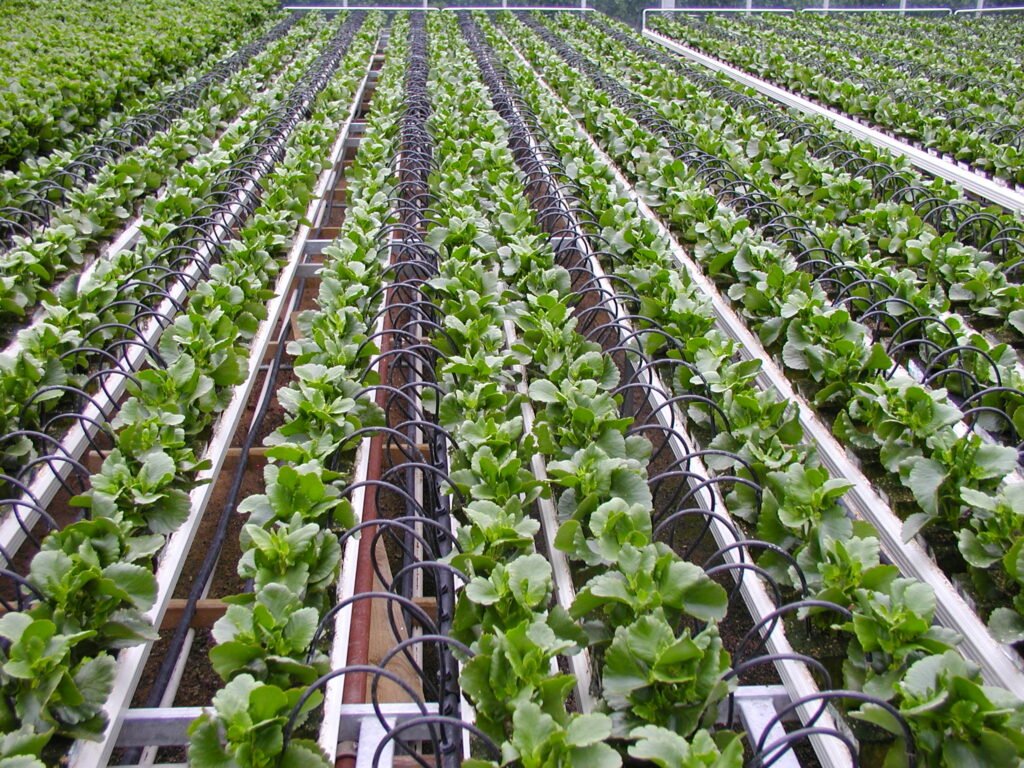
AIM: to learn about the drip irrigation system
INFO:1. In drip irrigation there is minimal wastage of water as the water is directly supplied to y=the roots of the plant. there is reduction in the growth of weeds
2. the water comes through the supply i.e., the pond or lake
3. there the water gets filtered with the help of sand filter
4. there is the main pipe, then the sub-main pipe, then there are the distribution channels
5. at the end points of the distribution channel there are the end caps
5. in the middle of the distributors at specific intervals there are the drippers
NO OF SAPLINGS TO BE PLANTED
Feb 26, 2022 | Uncategorized
AIM: to calculate the no of saplings to be planted
REQUIREMENTS: knowledge about the type of sapling , table that is given above
PROCEDURE : 1. Decide the type of plant to be planted and then proceed
2. there would be a table that the government gives
EX] for marigold = 60*60
= 3600sq cm
In one acre = 43560sqft
= 1327708
No of saplings = acre of land / amount of land required by one plant
TO CALCULATE THE FOOD GIVEN TO THE GOAT
Feb 25, 2022 | Uncategorized
AIM: to calculate how much food has to be giveb to the goat
REQUIREMENTS: goat weight
PROCEDURE:
INFO: we need to determine the food given to a goat so that as to not overfeed or underfeed the goat
EXAMPLE :
EXAMPLE :
60(3%)
1.8Kg
TO MILK A COW
Feb 25, 2022 | Uncategorized
AIM: to milk a cow
REQUIREMENTS : cow , a milking person
PREPRATION BEFORE REMOVING MILK :
- first wash the cow ‘s milk sacs with some hot water
- 2. keep rubbing till they become tight
PROCEDURE :1. just curl your fingers i n with your thumb inside
2. and hold the milk sacks and press the top one first then others in sucession
INFO:
DRY GRASS TREATEMENT
Feb 25, 2022 | Uncategorized
AIM:to do the treatement of the dry grasss to make it more easily digestiable and and to add nutrients in it
REQUIREMENTS: dry grass , jaggery , salt , water , a bin
PROCEDURE :1. weigh 10 kg of dry grass on a flat surface like a plastic sack
2. on the sack make a 6 inch high bed
3. then in a bucket mix 250 gm of salt and jaggery and 5L of water
6. mix it with the dry grass it is now ready to be give so will be if we pack it for 2 days in a bin and let it ferment
INFO: fermentation makes it easily digestible and also we can add nutrients this way.
TO CLEAN THE COW SHED OR GOTHA
Feb 25, 2022 | Uncategorized
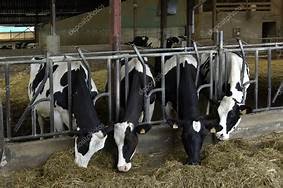
AIM: to clean the gotha
REQUIREMENTS: gotha , cow , water , scrubber , soap
PROCEDURE : just clen the cow and the gotah with some water
INFO: 1. we clean the shed to prvent the spread of the dieases and insects
2. the shed should be cleaned in a week or so
3. and everyday some water should fall on a cow s’ back
SEED PROCESSING
Feb 25, 2022 | Uncategorized

AIM: to learn about seed the processing
REQUIREMENTS:
PROCEDURE :
INFO:1. Dry seed treatement: M-45 , captain , metamicine , funcides are to be rubbed on the seed
2. wet seed treatement: M-45 solutions and splings are to be dipped into it
WHY WE DO THE SEED TREATEMENTS :
- Reduction in the diesses and insects
- Speeding in its growth
- Reduction in its genetically transmitted diesases
SEED COAT BREAKING METHOD ( OTHER METHOD OF THE SEED COAT BREAKING )
- Cooling
- Chemical
- Water soaking
- Sun drying
- Pressure
TO CALCULATE THE FCR OF A HEN
Feb 25, 2022 | Uncategorized

AIM: to calculate the FCR of a hen
REQUIREMENTS:no of hens , info about their feed eaten , its initial and final mass ,
Example: in ramu’s poultry on 21/2/2022 avaerage weight of the hens was 1255gm
The weight before 7 days was 900 g . according to ramu’s data 390Kg of feed was given . now calculate what is the FCR , cost of a hen , and cost of the feed
390*29= 5310Rs for the feed
FCR = total feed / weight gain
Total weight gain = 355*500 = 177500g
= 177.5 Kg
FCR = 390/177.5
When 2.19 Kg food is given to one hen it gains 355gm weight
63.51 Rs of one hen
INFO:FCR(feed conversion ratio ) it is the amount of the feed given to the hen converted into meat
TO CALCULATE THE FCR OF A HEN
Feb 25, 2022 | Uncategorized

AIM: to calculate the FCR of a hen
REQUIREMENTS:no of hens , info about their feed eaten , its initial and final mass ,
Example: in ramu’s poultry on 21/2/2022 avaerage weight of the hens was 1255gm
The weight before 7 days was 900 g . according to ramu’s data 390Kg of feed was given . now calculate what is the FCR , cost of a hen , and cost of the feed
390*29= 5310Rs for the feed
FCR = total feed / weight gain
Total weight gain = 355*500 = 177500g
= 177.5 Kg
FCR = 390/177.5
When 2.19 Kg food is given to one hen it gains 355gm weight
63.51 Rs of one hen
INFO:FCR(feed conversion ratio ) it is the amount of the feed given to the hen converted into meat
INSECTICIDE SPRAYING
Feb 25, 2022 | Uncategorized

AIM: to spray the pesticides over the crops
REQUIREMENTS: spraying machine, medicine , water, plants to be sprayed
PROCEDURE :1. Mix in 5L of water the following medicins
- Neem extract = 25ml
- Seaweed extract = 50ml
- M-45 = 15gm
2. mix the solution=on properly and start spraying the solution
3. start spraying the solution
INFO: we spray te pesticides to p[prevent the fungal attacks on the crops and also to prevent the insects attacks
SOIL TESTING
Feb 19, 2022 | Uncategorized
SOLI TESTING : Ph VALUE
- Take reagent PH-1 in test bottle 1 up to the 5ml mark
- Add 2 flat spoons of soil 2gm in the test bottle n o 1 with the help of funnel
- Put and mix by gentle inversions for 1 min
- Insert the color chart in the comparator unit and determine the ph
SOIl TESTING : PHOSPHURUUS VALUE
- Take reagent AP -1 in test bottle 1 up to the 6ml mark
- Add 1 flat spoons of soil 1 gm in the test bottle no 1 with the help of funnel
- Put and mix by gentle inversions for 1 min and let the bottle stand for 5 mins so that the soil settles
- Carefully draw the upper fluid with the help of a dropper up to 3ml level mark
- To 3ml liquid in the dropper and transfer the same to the test bottle -2 to make the level up to 3ml
- To 3ml mark liquid in bottle no -2 add 6 drops of phosphorus reagent AP – 2 and mix gently by the swirling add 3 drops of AP – 3 put the cap on and mix well color will develop
- Insert the color chart in the comparator unit and determine the phosphorus value
Soil TESTING : NITROGEN
- Take reagent AN -1 in test bottle 1 up to the 6ml mark
- Add 1 flat spoons of soil 1 gm in the test bottle no 1 with the help of funnel
- Put and mix by gentle inversions for 1 min
- To 3ml liquid in the dropper and transfer the same to the test bottle -2 to make the level up to 2ml
- To test bottle no – 2 add 4 drops of reagent AN – 2 and mix gently
- In test bottle add 4 drops of reagent AN – 3. put cap on mix gently wait for 5 mins
- Insert the available nitrogen color chart in the comparator unit . now the nitrogen color and matched the color of the bottle
- After 5min put the bottle in the nitrogen comparator
Soil TESTING : POTASSIUM
- Take reagent AK -1 in test bottle 1 up to the 6ml mark
- Add 2 flat spoons of soil 2gm in the test bottle n o 1 with the help of funnel
- Put and mix by gentle inversions for 1 min and let the bottle stand for 5 mins so that the soil settles
- Carefully draw the upper fluid with the help of a dropper up to 2ml level mark
- To te 2ml liquid o=in the bottle no-2 add one tablet of potassium reagent AK – 2 swirling intermediately to assist dissolution ( it may take 5 – 6 mins for complete dissolution the color will change to purple we will commence the testing once the tablet gets dissolved
- We take AK-3 in the bottle take 2 drops in the bottle
- Take reagent AK – 4 in the syringe and add reagent till the color of the solution turns to blue and count the drops while doing it
Soil TESTING : OC
- Add 1 flat spoons of soil 1 gm in the test bottle no 1 with the help of funnel
- Pour the reagent OC-1 1ml in the test bottle 1
- Mix 80 drops of reagent OC – 2 and mix it with care as it is abrasive chemical
- Add reagent OC-3 to make the 5ml allow bottole to settle for 5min
- Insert the OC comparator
THEORY : PLANT FERTILIZER REQUIREMENTS
Feb 19, 2022 | Uncategorized

Area requirement for plants
soyabean= 30* 120cm
sugar cane = 100* 120cm
marigold = 60* 60cm
Turmeric = 30* 30cm
Grapes = 3 * 1.5 cm
THEORY : PLANT FERTILIZERS
Feb 19, 2022 | Uncategorized
Theory:
plant requirement:
oxygen carbon dioxide = most required
nitrogen Phosphorus potassium = macronutrients
Iron Magnesium Sulphate = micro nutrients
iron magnesium Boron zinc copper chlorine = micro micronutrients
types of fertilizers:
- natural fertilizers: this is produced by using organic things like cow dung ko dove letter of penzance
- chemical fertilizers: plant or organic based fertilizers are processed so that it unlocks the nutrients easily notice given it is known as chemical fertilizers
- bio fertilizers: the fertilizers increase the quality of bio logical organisms in soil the bacteria except
Bacteria is like
Rhizobium
Acetobacter
- mixed fertilizers: this type of fertilizer is the combination of Nitrogen Phosphorus and Potash in one
N P K
20: 20: 0
18: 46: 0
10: 26: 26
This means in the example 18: 46:0
N= 18%
P = 46%
100kg = 18:46
N= 18kg
P = 46kg
Water soluble fertilizers:
N P K
19:19:19
12: 61: 0
0:52:34
13: 0 45
13:40: 13
This type of fertilizers are made water soluble so these are easier to distribute along with water geyser super advantages in hydroponic systems
FERTILIZER ADDIG
Feb 19, 2022 | Uncategorized

AIM: Fertilizer dosage for chilli crop
fertilizer dosage= 100: 50: 50
Number of of sapling = area of land / distance between them
Chilli= 60* 45 = 27000sq cm = 88.58 sq m
1 kg nitrogen = 2.17 kg urea
100 kg nitrogen = 2.17 * 100
= 2.17/ 2.5 = 86.8 kg nitrogen
Phosphorus (SSP) single super phorspurus
1kg = 6.25 kg
50 kg = 6.25 * 50
= 312/ 2.5 = 125 kg
Potassium (MOP) murate of potash
1kg = 2.08 kg
50 kg= 0.08 kg* 50
= 104/ 2.5 = 41. 623
15 18 there are 490 then saplings plant
N = 86.8/490 = 0.177
P = 125/490 = 0.255
K 41.5/490 = 0.084
TISSUE CULTURE
Feb 19, 2022 | Uncategorized
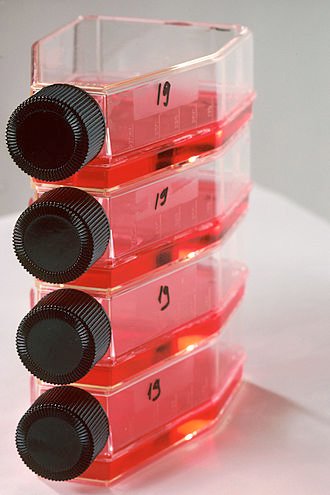
“Tissue culture is the technique of growing cells and tissues in an artificial medium separate from the organism.”
Table of Contents
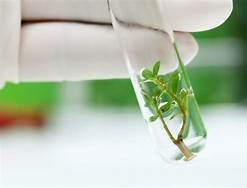
WHAT IS TISSUE CULTURE?
Tissue culture is a technique in which fragments of plants are cultured and grown in a laboratory. Many times the organs are also used for tissue culture. The media used for the growth of the culture is broth and agar.
This technique is also known as micropropagation. It has proved beneficial for the production of disease-free plants and increase plant yield in developing countries. It only requires a sterile workplace, greenhouse, trained manpower, and a nursery.
Oil palm, banana, eggplant, pineapple, rubber tree, tomato, sweet potato have been produced by tissue culture in the developing countries.
TYPES OF TISSUE CULTURE
Following are the different types of tissue culture techniques:
SEED CULTURE
In this culture, the explants are obtained from an in-vitro derived plant and introduced into a laboratory where they proliferate. The explant should be sterilized to prevent it from tissue damage.
EMBRYO CULTURE
This involves the in-vitro development of an embryo. For this, an embryo is isolated from a living organism. Both, a mature or an immature embryo can be used in the process. Mature embryos can be obtained from ripe seeds. The immature embryos are obtained from the seeds that failed to germinate. The ovule, seed or fruit is already sterilized, therefore, it does not need to be sterilized again.
CALLUS CULTURE
A callus is an unorganized, dividing mass of cells. When the explants are cultured in a proper medium, the callus is obtained. The growth of callus is followed by organ differentiation. The culture is grown on a gel-like medium composed of agar and specific nutrients required for the growth of the cells.
ORGAN CULTURE
In this, any organ of the plant such as shoot, leaf, can be used as an explant. A number of methods can be used for the organ culture, such as plasma clot method, raft method, grid method, and agar gel method. This method is used to preserve the structure and functions of an organism.
PROTOPLAST CULTURE
It is a cell without a cell wall. A protoplast can be cultured using the hanging-drop method, or micro-culture chambers. In protoplast culture, a number of phases can be observed: development of cell wall, cell division, regeneration of a whole plant.
OTHER TYPES
- Pollen Culture
- Anther Culture
- Single Cell Culture
- Suspension Culture
- Somatic Embryogenesis
STEPS OF TISSUE CULTURE
The steps of tissue culture are given below:
INITIATION PHASE
At this stage, the tissue is initiated into the culture. The tissue of interest is obtained, introduced and sterilized to prevent the process from any contamination.
MULTIPLICATION PHASE
In this stage, the sterilized explant is introduced into the medium composed of growth regulators and appropriate nutrients. They are responsible for the multiplication of cells. This undifferentiated mass of cells is known as a callus.
ROOT FORMATION
The roots start forming. Plant growth hormones are added to initiate the root formation. Consequently, we obtain a complete plantlets.
SHOOT FORMATION
The plant growth hormones for the formation of shoot are added and the growth is observed for a week.
ACCLIMATIZATION
When the plant starts developing, it is transferred to the greenhouse to develop under controlled environmental conditions. It is finally transferred to the nurseries to grow under natural environmental conditions.
ADVANTAGES OF TISSUE CULTURE
Following are the various advantages of tissue culture technique:
- The plantlets are obtained in a very short time with a small amount of plant tissue.
- The new plants produced are disease-free.
- The plants can be grown throughout the year, irrespective of the season.
- A large space is not required to grow plants by tissue culture technique.
- The production of new varieties in the market place speeds up.
- This technique is being used for the production of ornamental plants such as dahlia, chrysanthemum, orchids, etc.
IMPORTANCE OF TISSUE CULTURE
Tissue culture is very important in biology due to its wide range of applications.
Both plant and animal tissues can be used for culturing. For eg., animal tissue culture helps in preserving an organ or tissue.
Plant tissue culture may be used for genetic modification of a plant or simply increase its yield. the cells of the plants can be genetically altered to produce plants with desirable characteristics.
This technique utilizes the plant’s ability to rejuvenate the tissues rapidly. It produces exact copies of itself known as clones.
It is a technique of quickly producing plants without any tubers, seeds or bulbs.
It also helps in the conservation of plant biodiversity by the production of endangered plants
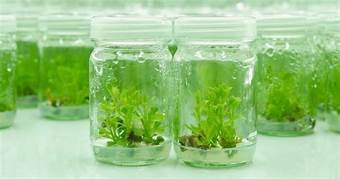
Tissue culture is the growth of tissues or cells in an artificial medium separate from the parent organism. This technique is also called micropropagation. This is typically facilitated via use of a liquid, semi-solid, or solid growth medium, such as broth or agar. Tissue culture commonly refers to the culture of animal cells and tissues, with the more specific term plant tissue culture being used for plants. The term “tissue culture” was coined by American pathologist Montrose Thomas Burrows.[1]
CONTENTS
HISTORICAL USE[EDIT]
In 1885 Wilhelm Roux removed a section of the medullary plate of an embryonic chicken and maintained it in a warm saline solution for several days, establishing the basic principle of tissue culture. In 1907 the zoologist Ross Granville Harrison demonstrated the growth of frog embryonic cells that would give rise to nerve cells in a medium of clotted lymph. In 1913, E. Steinhardt, C. Israeli, and R. A. Lambert grew vaccinia virus in fragments of guinea pig corneal tissue.[2] In 1996, the first use of regenerative tissue was used to replace a small length of urethra, which led to the understanding that the technique of obtaining samples of tissue, growing it outside the body without a scaffold, and reapplying it, can be used for only small distances of less than 1 cm.[3]
Gottlieb Haberlandt first pointed out the possibilities of the culture of isolated tissues, plant tissue culture.[4] He suggested that the potentialities of individual cells via tissue culture as well as that the reciprocal influences of tissues on one another could be determined by this method. Since Haberlandt’s original assertions, methods for tissue and cell culture have been realized, leading to significant discoveries in biology and medicine. His original idea, presented in 1902, was called totipotentiality: “Theoretically all plant cells are able to give rise to a complete plant.”[5][6][7]
MODERN USAGE[EDIT]
Main article: Cell cultureCultured cells growing in growth medium
In modern usage, “tissue culture” generally refers to the growth of cells from a tissue from a multicellular organism in vitro. These cells may be cells isolated from a donor organism (primary cells) or an immortalised cell line. The cells are bathed in a culture medium, which contains essential nutrients and energy sources necessary for the cells’ survival.[8] Thus, in its broader sense, “tissue culture” is often used interchangeably with “cell culture“. On the other hand, the strict meaning of “tissue culture” refers to the culturing of tissue pieces, i.e. explant culture.
Tissue culture is an important tool for the study of the biology of cells from multicellular organisms. It provides an in vitro model of the tissue in a well defined environment which can be easily manipulated and analysed. In animal tissue culture, cells may be grown as two-dimensional monolayers (conventional culture) or within fibrous scaffolds or gels to attain more naturalistic three-dimensional tissue-like structures (3D culture). Eric Simon, in a 1988 NIH SBIR grant report, showed that electrospinning could be used to produced nano- and submicron-scale polymeric fibrous scaffolds specifically intended for use as in vitro cell and tissue substrates. This early use of electrospun fibrous lattices for cell culture and tissue engineering showed that various cell types would adhere to and proliferate upon polycarbonate fibers. It was noted that as opposed to the flattened morphology typically seen in 2D culture, cells grown on the electrospun fibers exhibited a more rounded 3-dimensional morphology generally observed of tissues in vivo.[9]
APPROXIMATE WEIGHT OF A COW
Feb 19, 2022 | Uncategorized
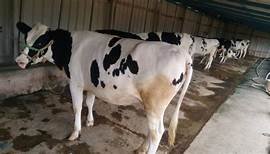
AIM: Approximate weight of a cow
Requirements: cow, measuring tape
Procedure: 1. from the front leg bone to the last leg bone measure the distance
2. then measure the chest circumference with measuring tape
Info: formula for calculating cow weight = (chest circumference)^2 * length / 666
Note: the reading should be in inches
in our case chest width 72 inch and length was 52 inch so the approximate weight was 404 kg
