INTRODUCTION:
As a farmer, understanding your soil’s health is crucial for optimal crop yields, reduced fertilizer costs, and environmental sustainability. Soil testing provides valuable insights into nutrient levels, pH balance, and contaminant presence, helping you make informed decisions. In this blog, we’ll explore the importance of soil testing, types of tests, and how to interpret results for your farm.
BENEFITS OF SOIL TESTING FOR FARMS:-
1. Increased Yields: Optimized nutrient levels and pH balance boost crop growth.
2. Reduced Fertilizer Costs: Targeted fertilizer applications minimize waste.
3. Environmental Sustainability: Identify contaminant risks and implement conservation practices.
4. Improved Soil Structure: Enhance water-holding capacity and reduce erosion.
5. Data-Driven Decision Making: Inform irrigation, tillage, and crop rotation strategies.
How To Collect Soil Samples:
1. Choose 10-15 representative locations per field.
2. Dig 6-8 inch deep holes.
3. Mix samples in a bucket.4. Fill test kit containers or send to a lab.
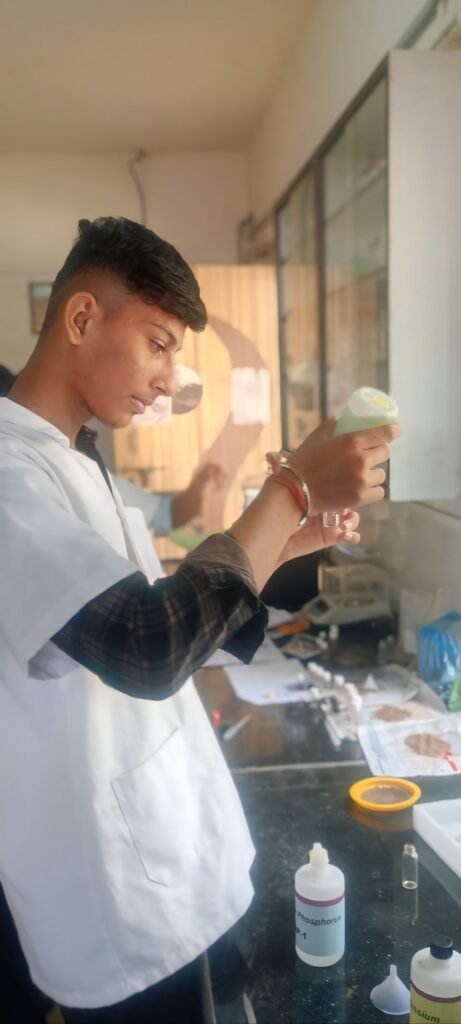
1)SOIL – PH TEST
1. Take Reagent pH-1 in Test Bottle No. 1 up to 5 ml. mark.
2. Add 2 flat spoonful of Soil (2gm.) in Test Bottle No. 1 with the help of funnel.
3. Put cap and mix by gentle inversion for one minute. (Do not shake vigorously. Mix for one minute only) Allow the bottle to stand for 10 minutes. Soil will settle & seperate to leave clear liquid layer onthe top.
4. Insert the pH Colour chart in the Comparator Unit. Now the pH Colour Comparator can be used for matching of pH test colour.
5. Place the Bottle No. 1 in pH COLOUR COMPARATOR and match the colour of top liquid layer with colours on the comparator. Read Soil pH directly on comparator .
2) TEST FOR AVAILABLE PHOSPHORUS
1. Take in Test Bottle No. 1, Phosphorous Reagent AP-1 up to 6 ml. mark.
2. Using funnel, add one flat spoonful (1gm.) of soil in Test Bottle No. 1
3. Put cap and mix by gentle inversion for one minute. (Do not shake vigorously. Mix for one minute only) Allow the bottle to stand for 5 minutes. Soil will settle & seperate to leave clear liquid layer on the top.
4. Carefully draw upper clear liquid in dropper and transfer the same to Test Bottle No. 2 to make level up to 3 ml. Mark. (Do not pull up any soil in the dropper. To avoid agitation of soil, squeeze bulb of dropper before inserting its tip into liquid. Release bulb slowly to draw clear liquid.)
5. To 3ml. liquid in Bottle No. 2, add 6 drops of phosphorous Reagent AP-2 and mix gently by swirling. Add 3 drops of Reagent AP-3. Put cap and mix well. Blue colour will develop in Bottle No. 2.
6. Insert the Available Phosphorus Colour chart in the Comparator Unit. Now the Phosphorus Colour Comparator can be used for matching of Available Phosphorus test colour.
7. Place the Bottle in Phosphorous colour comparator & match the colour of bottle with the colours on Phosphorous colour comparator.
3)AVAILABLE NITROGEN (N) IN SOIL
1. Take in Test Bottle No. 1, Nitrogen Reagent AN-1 up to 6 ml. mark.
2. Using funnel, add one flat spoonful of Soil (1gm.) in Test Bottle No. 1
3. Put cap and mix by gentle inversion for one minute. (Do not shake vigorously. Mix for one minute only) Allow the bottle to stand for 5 minutes. Soil will settle & seperate to leave clear liquid layer on the top.
4. In clean Bottle No. 2, carefully transfer 2 ml of upper clear liquid from Bootle No. 1, using dropper. (Carefully draw liquid from Bottle No. 1 in dropper. Do not pull up any soil in the dropper, while drawing liquid. To avoid agitation of soil, squeeze bulb of dropper before inserting tip into liquid. Release bulb slowly to draw clear liquid.)
5. To Test Bottle No. 2, add 4 drops of Reagent AN-2. & mix gently.
6. To Test Bootle No. 2, add 4 drops of Reagent AN-3, Put cap & mix gently. Wait for 5 minutes.
7. Insert the Available Nitrogen Colour Chart in the Comparator Unit. Now the Nitrogen Colour Comparator can be used for matching Available Nitrogen test colour.
8. After 5 minutes, mix gently & place the Bottle in Nitrogen Colour Comparator & match the colour of bottle with colours on Comparator.
9. Read the available Nitrogen directly on Comparator.
4)ORGANIC CARBON in Soil
1. Using 100mg. Spoon, take one spoonful (100mg.) of finely ground Soil in Test Bottle No. 1.
2. To the Bottle No. 1, add 0.5 ml. of Reagent OC-1 with the help of 1 ml. Green coloured Syringe (Do not use red coloured syringe)
3. To the Bottle No. 1, add 80 drops of Reagent) OC-2 and mix by gentle swirling. (Caution! Reagent OC-2 is a strong acid. Handle carefully avoid contact.) Put cap. Wait for 30 minutes.
4. Add Reagent OC-3 to make the level in Bottle No. 1 upto 5 ml. mark. Mix by gentle swirling. Allow the bottle to stand for 5 minutes. Soil will settle & separate to leave clear liquid layer on the top.
5. Insert the Organic Carbon Colour chart in the Comparator Unit. Now the Organic Carbon Colour Comparator can be used for matching Organic Carbon test colour.
6. Place the Bottle in ORGANIC COLOUR COMPARATOR and match the colour of top liquid layer with the colour slots on COMPARATOR by holding the Comparator against day light.
5)AVAILABLE POTASSIUM (K) in Soil
1. Take in Test Bottle No. 1, Potassium Reagent AK-1 up to 6 ml. mark
2. Using spoon (1gm.capacity) and funnel, add two flat spoonful (2gm.) of Soil in Test Bottle No. 1
3. Put cap and mix by gentle inversion for one minute. (Do not shake vigorously. Mix for one minute only) Allow the bottle to stand for 5 minutes. Soil will settle & seperate to leave clear liquid layer on the top.
4. Carefully draw upper liquid in dropper and transfer the same to another clean Bottle No.2, to make level up to 2 ml. Mark. (Do not pull up any soil in dropper. To avoid agitation of soil, squeeze bulb of dropper before inserting its tip in to liquid. Release bulb slowly to draw clear liquid in to the dropper.)
5. To 2 ml. liquid in bottle No. 2, add one tablet of potassium Reagent AK-2. Do not put cap. Mix by swirling. Allow tablet to dissolve completely. Mix by swirling intermittantly to assist dissolution (It may take 5-6 minutes to dissolve the tablet completely) Proceed further only after complete dissolution of tablet.
6. Now, add to Boottle No.2, 4 drops of Reagent AK-3 (Do not add more or less drops) and mix. Water will turn Purple in Colour.
7. Now, add to Boottle No.2, Reagent AK-4 two drops at a time and mix geni after each addition. Keep Count of drops and continue addition of two dro at a time, until Colour changes from Purple to Blue.


RESULTS :-
SOIL PH :- 8.5
ORGANIC CARBON:- 0.1
NITROGEN :- 280 KG/HA (M
PHOSPHORUS :- 21 (Medium high )
POTASSIUM :- 14
CONCLUSION:-
Soil testing is a vital tool for farmers to optimize crop yields, reduce costs, and promote environmental sustainability.


